👔Don’t get stuck in a KNOT!👔

Hi Everyone and thank you for stopping by Suits Avenue’s Blog page!

Have you ever had that one special event that you were so excited for…you start crossing the days off your calendar, checking the countdown you how downloaded on your phone every 15 minutes as if that’s going to take the days away…but then that day finally comes and BAM just like that all your excitement is gone…. you don’t know how to tie your tie.

Well worry no more! In today’s blog, we are going to walk you through simple step-by-step guides to tying your own tie.

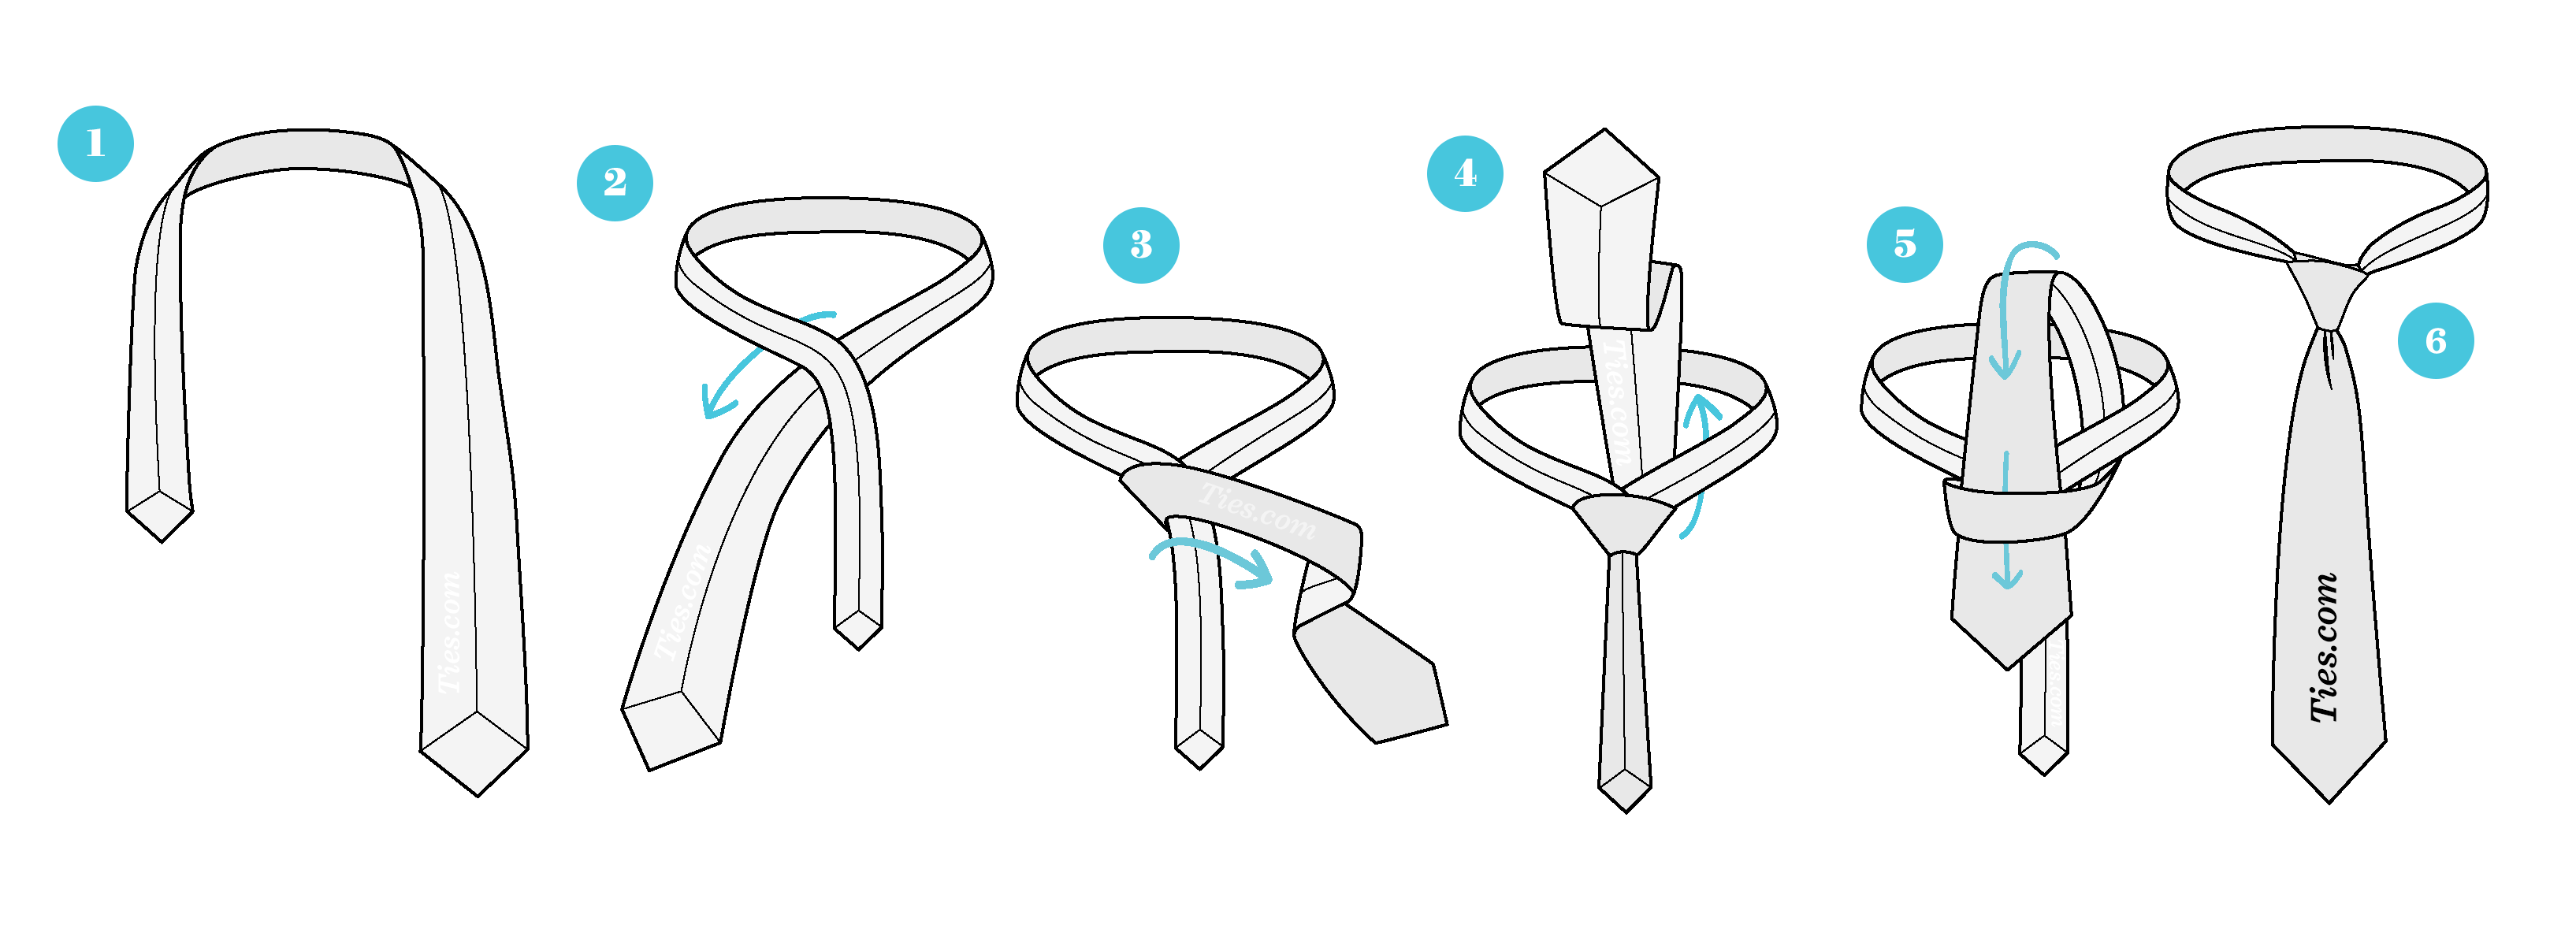
The first tie we are going to discuss is the Prince Albert. We teach men who come to our store this specific knot because its quick and simple leaving your perfect day hassle free.

Prince Albert

albert

Knot Size: 3/5       Symmetry: 2/5      Difficulty: 3/5

Step-by-step how to tie the Prince Albert knot:

  1. Start with wide end on right slim on left
  2. Move the wide end from the right to the left
  3. Move the wide end under the small end and to the right
  4. Move the wide end across the front and to the left
  5. Move the wide end under the small end and move the knot up while pulling the smaller side down and it will tighten.. you are now complete with the Prince Albert Tie.

Half Windsor
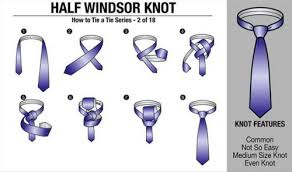
windsor

Knot size: 3/5     Symmetry: 3/5     Difficulty: 3/5

Step-by-step how to tie the Half Windsor Knot:

  1. Start with wide end of the tie on the right and the skinny side on the left
  2. Move the wide end over the small and to the left
  3. Move the wide end under the small end and to the right
  4. Move the wide end up the center, towards the neck loop
  5. Move the wide end through the neck loop and to the left
  6. Move the wide end across the front and over to the right
  7. Move the wide end up into the neck loop from underneath (This will create a loop)
  8. Move the wide end down through the loop just created in the front
  9. Tighten the knot by pulling down on the wide side and pushing the knot up…. you have now completed the Half-Windsor

đŸ€”Click here to learn how to dress for an interviewđŸ€”

Windsor

full windsor

Knot Size:  4/5    Symmetry: 5/5   Difficulty: 2/5

Step-by-step how to tie the Windsor knot:

  1. Start with the wide end on the right and the skinny end on the left.
  2. Move the wide end over the small end and to the left
  3. Move the wide end up into the neck loop from underneath
  4. Move the wide end now down through that neck hole and to the left
  5. Move the wide end around the back of the small end and to the right
  6. Move the wide end to the center towards the neck loop
  7. Move the wide end through the neck loop and down to the right
  8. Move the wide end across the front to the left
  9. Move the wide end up and into the neck loop from underneath (This will create a loop)
  10. Move the wide end down through the loop just created in the front
  11. Tighten the knot by pulling down on the wide side and pushing the knot up… you have now completed the Windsor Knot

đŸ€” Now that you know how to tie a few knots- click here to learn how to match your tie with your suit! đŸ€”

Simple knot/ Oriental Knot:

oriental knot.png

Knot Size:  1/5    Symmetry: 4/5   Difficulty: 1/5

Step-by-step how to tie the simple knot / oriental knot:

  • 1. Start with the backside of the tie facing away from you, the wide end is on the right and the small end is on the left. The tip of the small end should rest slightly above your belly-button (this will vary depending on your height and the length & thickness of your tie). Move only the active (wide) end.
  • 2. Wide end under the small end to the left.
  • 3. Across the small end to the right.
  • 4. Up into the neck loop from underneath.
  • 5. Down through the loop you’ve just made in the front.
  • 6. Pull down on the wide end to tighten. Slide the knot up to adjust.

The Four in Hand knot:

fourinhand.jpg

Knot Size:  2/5    Symmetry: 3/5   Difficulty: 1/5

Step-by-step how to tie a four-in-hand knot:

  • 1. Start with the wide end of the tie on the right and the small end on the left. Begin with the small end slightly above your belly-button (will vary depending on your height and the length & thickness of your tie). Only move the active (wide) end.
  • 2. Wide end over the small end to the left
  • 3. Under the small end and to the right
  • 4. Across the front and to the left
  • 5. Up into the neck loop from underneath
  • 6. Down through the loop you’ve just made in the front
  • 7. Tighten the knot by pulling down on the wide end. Slide the knot up & adjust.

For other GREAT how-to tips on tie tying visit

ties.com

Stop on in the store today and we can help you tie your tie!!!

⬇Fill out the form below for any other questions! âʇ

← Back

Thank you for your response. ✹

The only sites we used when creating this blog were…

https://www.ties.com/how-to-tie-a-tie/simple

http://an-ivy.com/guide-all-you-need-to-know-about-ties/

http://www.tie-a-tie.net/tips/

Hi Everyone and thank you for stopping by Suits Avenue’s Blog page!

Have you ever had that one special event that you were so excited for…you start crossing the days off your calendar, checking the countdown you have downloaded on your phone every 15 minutes as if that’s going to take the days away…but then that day finally comes and just like that all your excitement is gone…. you don’t know how to tie your tie.

Well worry no more! In today’s blog, we are going to walk you through simple step-by-step guides to tieing your own tie.

The first tie we are going to discuss is the Prince Albert. We teach men who come to our store this specific knot because its quick and simple leaving your perfect day hassle free.
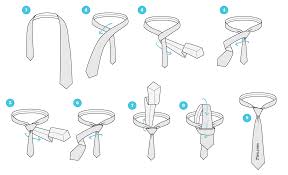
Knot Size: 3/5       Symmetry: 2/5      Difficulty: 3/5

Step-by-step how to tie the Prince Albert knot:

  1. Start with wide end on right slim on left
  2. Move the wide end from the right to the left
  3. Move the wide end under the small end and to the right
  4. Move the wide end across the front and to the left
  5. Move the wide end under the small end and move the knot up while pulling the smaller side down and it will tighten.. you are now complete with the Prince Albert Tie.

The

Knot size: 3/5     Symmetry: 3/5     Difficulty: 3/5

Step-by-step how to tie the Half Windsor Knot:

  1. Start with wide end of the tie on the right and the skinny side on the left
  2. Move the wide end over the small and to the left
  3. Move the wide end under the small end and to the right
  4. Move the wide end up the center, towards the neck loop
  5. Move the wide end through the neck loop and to the left
  6. Move the wide end across the front and over to the right
  7. Move the wide end up into the neck loop from underneath (This will create a loop)
  8. Move the wide end down through the loop just created in the front
  9. Tighten the knot by pulling down on the wide side and pushing the knot up…. you have now completed the Half-Windsor

Click here to read about taking care of your clothes!

The

Knot Size:  4/5    Symmetry: 5/5   Difficulty: 2/5

Step-by-step how to tie the Windsor knot:

  1. Start with the wide end on the right and the skinny end on the left.
  2. Move the wide end over the small end and to the left
  3. Move the wide end up into the neck loop from underneath
  4. Move the wide end now down through that neck hole and to the left
  5. Move the wide end around the back of the small end and to the right
  6. Move the wide end to the center towards the neck loop
  7. Move the wide end through the neck loop and down to the right
  8. Move the wide end across the front to the left
  9. Move the wide end up and into the neck loop from underneath (This will create a loop)
  10. Move the wide end down through the loop just created in the front
  11. Tighten the knot by pulling down on the wide side and pushing the knot up… you have now completed the Windsor Knot


Click here for the free tie promo!

The

Knot Size:  1/5    Symmetry: 4/5   Difficulty: 1/5

Step-by-step how to tie the simple knot / oriental knot:

  • 1. Start with the backside of the tie facing away from you, the wide end is on the right and the small end is on the left. The tip of the small end should rest slightly above your belly-button (this will vary depending on your height and the length & thickness of your tie). Move only the active (wide) end.
  • 2. Wide end under the small end to the left.
  • 3. Across the small end to the right.
  • 4. Up into the neck loop from underneath.
  • 5. Down through the loop you’ve just made in the front.
  • 6. Pull down on the wide end to tighten. Slide the knot up to adjust.

The

Knot Size:  2/5    Symmetry: 3/5   Difficulty: 1/5

Step-by-step how to tie a four-in-hand knot:

  • 1. Start with the wide end of the tie on the right and the small end on the left. Begin with the small end slightly above your belly-button (will vary depending on your height and the length & thickness of your tie). Only move the active (wide) end.
  • 2. Wide end over the small end to the left
  • 3. Under the small end and to the right
  • 4. Across the front and to the left
  • 5. Up into the neck loop from underneath
  • 6. Down through the loop you’ve just made in the front
  • 7. Tighten the knot by pulling down on the wide end. Slide the knot up & adjust.

The

Knot size: 3/5     Symmetry: 3/5     Difficulty: 3/5

  1. Drape the necktie around your collar with the seam facing inward and the thick end on your right, about a half an inch lower than you want the finished tie to hang.
  2. Cross the thin end over the thick end, forming an X. Then bring the thin end up through the loop you just formed, behind the X.
  3. Flip the thin end over the top of the knot.
  4. Bring the thin end behind the knot from left to right.
  5. Bring the thin end across the front from right to left.
  6. Bring the thin end behind the knot and up through the loop around your neck. This will leave a horizontal band across the front of the knot.
  7. Flip the thin end over the front of the knot so that it hangs down.
  8. Bring the thin end slightly to the left of the thick end, then fold it around behind the knot, passing from left to right.
  9. Bring the thin end up in front of the knot, pointing the tip upward and toward your left shoulder.
  10. Tuck the thin end through the loop around your collar, behind the rest of the knot and emerging on the left side of the thick end.
  11. Tug the thin end down firmly and take a moment to arrange the center of the knot. You want the diagonal legs to rise at the same angle, meeting squarely beneath your chin.
  12. Flip the thick forward and up. You can toss it over one shoulder.
  13. Turn the thin end point-upward and slip it through the single horizontal loop across the back of the knot.
  14. Pull the thin end all the way through the loop and snug it up tight.
  15. Flip the two ends of the tie back down.
  16. Tighten carefully by holding the knot in one hand while tugging on the thick end with your other.

“THEY HELPED ME MATCH SHIRT AND TIE… I FEEL CONFIDENT.”
MUGISHAAttoreny
“THESE GUYS ARE THE BEST IN TOWN, REAL REAL IMPORTED CLOTHES”
KITAKUYIOffice
I am slide content. Click edit button to change this text. Lorem ipsum dolor sit amet, consectetur adipiscing elit. Ut elit tellus, luctus nec ullamcorper mattis, pulvinar dapibus leo.
John DoeCEO
30 days before wedding Suits Avenue saved my neck, QUALITY and customer care
RobertCEO
The gals made look smart for my job interview..AND i won the position…Thx Suits Avenue
SimonEmployeed

Find us, Follow us, and like us on FACEBOOK for latest fashion Trends…


Facebook

Click and SHARE…We would love to help your friends look smart…đŸ•ș💃 


If you have any questions or need help fill out the form below or stop in today and

👔Matching tie and shirt👔

Today we are going to discuss one of the most important parts of getting dressed in the morning – whether you’re getting ready for a big interview or just heading out to work in the morning – and thats how to properly match a suit and tie.

TIPS

  • Red heads look good in green
  • darker-skin men look good in light colors
  • never have a pattern on your suit AND tie
  • If you do, make sure they are not the same size pattern

Every person has their own unique sense of style but following these simple tips and tricks will keep you looking sharp and prepared to walk into any professional situation feeling confident. One of the most important steps you will take in your professional career is the job interview and being properly dressed will have you one leg up on the competition before the interview even starts.

It starts with slacks and a dress shirt. While that sounds simple enough there are many variations on this simple style that can make it seem difficult to match different colors and patterns together. If this is the case then the rule of thumb is to keep your colors simple. Keeping your outfit simple gives you a better opportunity to properly match colors together.

When it comes to matching you need to keep these things in mind

  1. Color
  2. Pattern
  3. Tones

You don’t need to understand color theory to properly get dressed. Here are some more tips to follow when getting ready in the morning:

  1. Don’t go crazy with color. If you haven’t experimented with color before then stick with less intense colors like your Blues, Blacks, and Greens before expanding into bolder, brighter colors.

2. Understand color scheme. A simple way to keep track of color to pair lighter and darker versions of the same color. This is a monochromatic color scheme and its a simple way to add some flair to your look. Another color scheme involves pairing colors that fall next to each other on the color wheel, such as wearing a dark purple shirt with a blue tie. On the other end you could also pair colors that fall completely opposite each other on the color wheel, such as a blue shirt and a red tie, a classic look that provides great visual contrast.

3. Be careful with patterns. You don’t need to be scared of patterns and now that you have a better understanding of color, adding a pattern to your wardrobe is the next logical step. There are many different options – shirt and tie with a pattern, solid tie and patterned shirt, etc. – but the one rule of thumb to have when using multiple patterns is to vary the proportions of each design.

If you decide you want patterns you need to keep these things in mind:

  1. Pattern- The pattern shouldn’t be too distracting. The pattern on your shirt should not be the same pattern on your tie.
  2. Size- The size of your patterns should not be the same. Go with a bigger pattern on your shirt and a smaller pattern on your tie, or vice-versa.

If you decide to go with patterns keep in mind they should ALWAYS vary in size and design.

If you look at a color wheel, you can see it is broken down into cool colors and warm colors.

There are so many different combinations to be made and now you have the confident and ability to get dressed and make a killer first impression! Keep in mind, if you decide to go with patterns they should ALWAYS vary in size and design. And remember the color wheel, it can be very important to ensure your outfit has the right tone and overall impression. The wheel is divided into cool and warm colors.

You want to stay in the same tone… for example, a light blue shirt with a navy tie or a light blue and a soft green

So now that you have a general idea about color and pattern lets dig into some specific tips that could change the way you buy clothes when you are out shopping:

  1. Pick a tie that complements the shirt AND jacket. You shouldn’t purchase shirts and jackets with a specific tie in mind as it is much easier (and cheaper!) to build your wardrobe around your more expensive items of clothing such as the suit jacket and shirt.
  2. Purchase a tie that measures between 3-3.5 inches. Anything larger than that will look too big and goofy and something smaller runs the risk of looking too thin and trendy.
  1. The pattern of the tie should never exactly match the shirt. Its okay to mix patterns and Dots, Stripes, and Paisley are all good patterns to choose from.

As new styles emerge its important to understand versatility and changing the fabric of the tie is one way that you can do this. But be careful because you don’t want anything too flashy for a job interview or similar setting. Here are some different fabrics to keep in mind when shopping for a tie:

  1. Silk: there are different types of silk but a silk tie in general is one of the best things you can own to ensure a slick and professional look.
  2. Satin: a cheaper alternative to silk.
  3. Cashmere: not the best option for warm weather as the soft fabric can be very irritating when hot.
  1. Polyester: the best option when purchasing a tie on a budget, doesn’t quite live up to the silk tie.


Click here for Special FREE offer with purchase…

“THEY HELPED ME MATCH SHIRT AND TIE… I FEEL CONFIDENT.”
MUGISHAAttoreny
“THESE GUYS ARE THE BEST IN TOWN, REAL REAL IMPORTED CLOTHES”
KITAKUYIOffice
I am slide content. Click edit button to change this text. Lorem ipsum dolor sit amet, consectetur adipiscing elit. Ut elit tellus, luctus nec ullamcorper mattis, pulvinar dapibus leo.
John DoeCEO
30 days before wedding Suits Avenue saved my neck, QUALITY and customer care
RobertCEO
The gals made look smart for my job interview..AND i won the position…Thx Suits Avenue
SimonEmployeed

Find us, Follow us, and like us on FACEBOOK for latest fashion Trends…


Facebook

Click and SHARE…We would love to help your friends look smart…đŸ•ș💃 

If you have any questions
the form below.

Our Blogs on Fashion…

Right Style for Grooms…2018


Imported Suits

Suits Avenue

🎉Importing quality with customer care🎉

Suits Avenue: The Right Style for Grooms in 2018


Hi and thanks for visiting Suits Avenue. Our blog post today will touch on a grooms personal style – specifically the right style of suit for grooms in 2018. Grooms have the flexibility of dozens of different suits styles and even suspenders aren’t off the table in today’s wedding ceremonies. 

Browse the different styles below and always remember the elements you will need to consider when selecting a style of suit to wear. These elements include the venue/location, time of year, how much you are willing to spend, as well as how many traditional you may want to break. Whether you rent or buy, choose a tuxedo or a more casual suit, we have the advice below and ideas for personalizing groom suits to match with your personal style.

Groom Style in 2018

Men are in luck because todays suit colors and textures are getting an upgrade. The classic black, navy and gray suits will always be in style, but now guys are opting for more colorful alternatives – this can be burgundy, dark green and even dusty mauve. Textures like casual tweeds and herringbone patterns are also playing a big role in outfits for grooms – and even their groomsmen!

Change Up the Neckwear

Neckwear is an easy – and uncomplicated – way to inject a little extra color and personality into the groom’s look. Make sure you pick out a different color or patterned tie from the rest of the groomsmen, or distinguish yourself even more and choose a bow tie while the groomsmen wear neckties. The choices can seem endless, but thinking about the formality of the location and the season of the event can help you settle on a type and fabric that feels right for your day.

Wear a Cool Pair of Socks

This pop of color will go unnoticed most of the time but can add a fun and fresh look to your wedding ensemble and a quirky pair makes for a great photo op—in a close-up along with the bride’s shoes, or in a wider shot that shows off the groom and groomsmen mix-and-match socks. Try an argyle or classic stripe for a preppy take, or go with a solid color block, nerdy graphic print or polka dot for a trendier look.

Seek Out Unique Shoes

Another tip along the lines of footwear, but stepping into a unique pair of shoes can complete the perfect look in 2018. The traditional groom wears black, as the color is known to be more formal, but depending on the color suit you choose, brown or even gray, oxblood or burgundy might look best. As for style, there aren’t any hard-and-fast rules. Oxfords, wingtips, monkstraps, loafers or a fresh pair of sneakers are all available options for grooms in 2018.

Even as a groom you should always remember that despite the year – the specific style and the color will depend on the season (fall, spring, etc.) and the venue where you are getting married. Exotic, beach, and outdoor settings will require much more different attire than a city wedding or a more traditional church wedding. This will also dictate the style – formal, classic, or something more contemporary – as well as the decision to wear a waistcoat and a 2-piece vs. a 3-piece suit. All of these elements will dictate the style of suit you will wear on the big day. Don’t stress out about the details and be sure to come back and visit the blog here at Suits Avenue!


Click here for Special FREE offer with purchase…

“THEY HELPED ME MATCH SHIRT AND TIE… I FEEL CONFIDENT.”
MUGISHAAttoreny
“THESE GUYS ARE THE BEST IN TOWN, REAL REAL IMPORTED CLOTHES” 
KITAKUYIOffice
I am slide content. Click edit button to change this text. Lorem ipsum dolor sit amet, consectetur adipiscing elit. Ut elit tellus, luctus nec ullamcorper mattis, pulvinar dapibus leo.
John DoeCEO
30 days before wedding Suits Avenue saved my neck, QUALITY and customer care
RobertCEO
The gals made look smart for my job interview..AND i won the position…Thx Suits Avenue
SimonEmployeed

Find us, Follow us, and like us on FACEBOOK for latest fashion Trends…


Facebook

Click and SHARE…We would love to help your friends look smart…đŸ•ș💃 

If you have any questions
the form below.

Our Blogs on Fashion…

đŸ€”How to take care of your clothesđŸ€”

How To: Care for your Suit

Hi everyone, thank you for reading How to care for your clothes with Suits Avenue!

Today we are going to give some tips on how to care for your suit to get the best look for the longest amount of time!

  1. The first step to suit care is ROTATING them!

If you wear the same suit every day, all day long it will never give the fibers time to relax or air out. It will always stay loose and never have the great “first fit” like it did when you first bought it.

2. Using round, wood hangers will give the suit enough space for air to flow through and getting the smells of your every day out. It also helps keep the suit fitting nice and tight. The rounded edges mock the shoulder make so it won’t stretch the suit out, only create enough space for it to relax in the natural form.

3. Keep very little in your pockets.

Do not overfill any of your pockets, inside or outside of the suit. Only carry your essentials, cash, business cards, or debit/credit cards. If you overload your pockets it will eventually change the shape of the suit. It will become 


Click here for Special FREE offer with purchase…

“THEY HELPED ME MATCH SHIRT AND TIE… I FEEL CONFIDENT.”
MUGISHAAttoreny
“THESE GUYS ARE THE BEST IN TOWN, REAL REAL IMPORTED CLOTHES” 
KITAKUYIOffice
I am slide content. Click edit button to change this text. Lorem ipsum dolor sit amet, consectetur adipiscing elit. Ut elit tellus, luctus nec ullamcorper mattis, pulvinar dapibus leo.
John DoeCEO
30 days before wedding Suits Avenue saved my neck, QUALITY and customer care
RobertCEO
The gals made look smart for my job interview..AND i won the position…Thx Suits Avenue
SimonEmployeed

Find us, Follow us, and like us on FACEBOOK for latest fashion Trends…


Facebook

Click and SHARE…We would love to help your friends look smart…đŸ•ș💃 

If you have any questions or need help speak with
or fill out the form below.

Our Blogs on Fashion…

đŸ€”How to get ready for a weddingđŸ€”

How To: Dress on your Wedding Day

Hi and thanks for visiting Suits Avenue! With wedding season in full swing today we are discussing the different suit colors for the wedding day and what color is right for you. It can be overwhelming to consider every detail of your suit before the big day – from the jacket and trousers to the cufflinks and the pocket squares – but the goal of this post is to ease the decision process for at least one of those details – the color of your suit. 

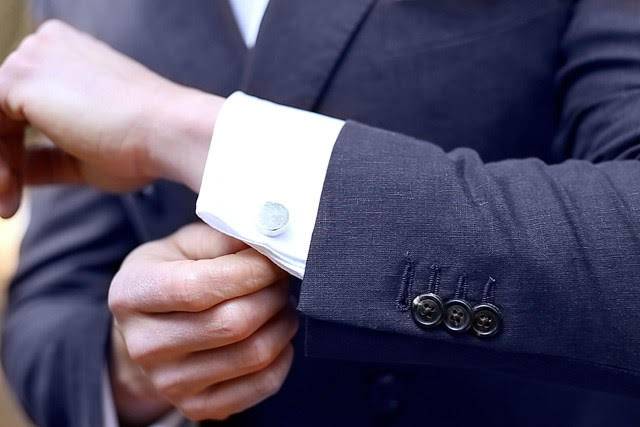
Cuff-link

Now the specific style and the color will depend on the season (fall, spring, etc.) and the venue where you are getting married. Exotic, beach, and outdoor settings will require much more different attire than a city wedding or a more traditional church wedding. This will also dictate the style – formal, classic, or something more contemporary – as well as the decision to wear a waistcoat and a 2-piece vs. a 3-piece suit. 

Before we discuss possible color choices it is important to stress the importance of the classic suit style. ATailoredSuit.com stresses opting “for suit styles and silhouettes that are timeless” to avoid time-stamping your wedding pictures. Going with a fun and contemporary look can help your wedding pop but “in the same way many of my female friends can time-date a picture based of the height of their big hair (think late 80’s and early 90’s), going with a trendy look is just that – trendy.” So keep that in mind when considering the colors listed below.

Suit colors for your
wedding day


Click here for Special FREE offer with purchase…

Suit Colors for the Wedding Day:

Blue Wedding Suit: Blue is a highly respected and traditional color (think Navy) suitable to impress younger and older generations because of the balance it strikes between the elegance of the wedding and the formality of the ritual taking place. Blue – especially in it’s different shades – is a charming color for the that gives an enduring impression and allows you to mix and match with different styles and colors.

Wedding Suit

Grey Wedding Suit: A classic grey or charcoal grey suit is great option if you are wearing a morning dress or just morning coat to your wedding. Lighter grey suits and other variations of grey can veer toward more casual destination weddings as it gives a very relaxed feeling.

Wedding Suit

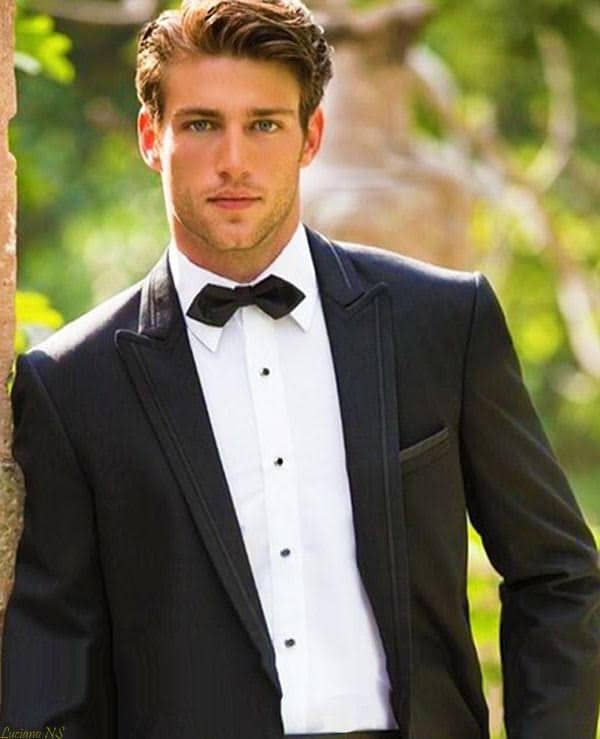
Black Wedding Suit: Black might not be the go-to color for this occasion. Black is a high-formality colour, but because of its associations with tuxedos and evening wear it may not actually be appropriate for a wedding. Your wedding is a celebration, it is not some very strict formal event so it might be best to avoid this color.

Tuxedo

What Next?

Now that you have the color of your suit picked out you should focus on the specific style you want as well as the specific accessories you will need. We discussed the importance of the classic suit style above so you should start considering your trousers, shirt, shoes, tie, belt, and cufflinks. Some of these decisions will be easier to make than others but they are all details that need to be considered. You should also consider the logistics of where you are getting your suit from – either purchasing it, renting it, or having it custom made by a tailor. 

When it comes down to it: don’t stress the small stuff before the big day. All of these details might seem overwhelming at first but taking it one step at a time can help. Now that we have discussed the color of your suit stay tuned to Suits Avenue and our blog here for more articles like this!

Whole attire

Today we are going to show you the proper attire to wear to a wedding!

First, you will need to start with a nice dress shirt

Office Shirt

For a formal occasion like a wedding, it is best to stick with solid color undershirts, the most common shirts are white or black, depending on the color of your suit.

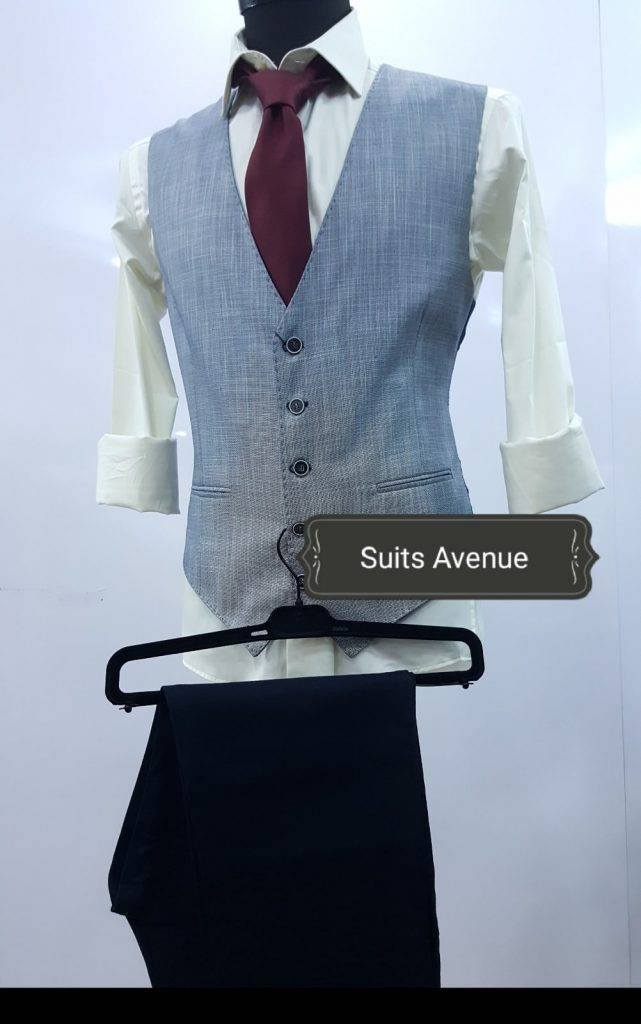
Next, you will need to find a tight-fitting vest.

Bust coat

It is best to get a tight-fitting vest so your jacket will easily form with your body so it doesn’t look baggy or too big.

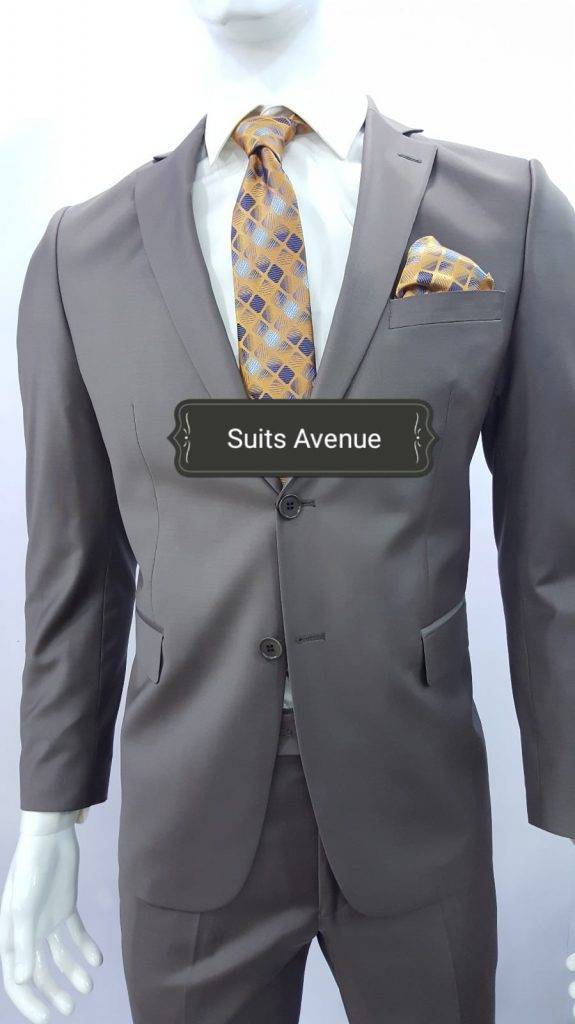
Now, you need nice, ironed dress paints and a matching blazer.

Imported suit

When purchasing your jacket there are a few key things to look for

  1. Make sure your shoulder fit perfectly. You don’t want them to be too snug so you cant move your arms, but it also can’t be too big and look like you are wearing shoulder pads.
  2. With the jacket buttoned, the lapels should lie flat on your chest. If they bow or leave a gap around your shirt collar try a different size.
  3. Your sleeves should hug your arms and show a half-inch of cuff
  4. With the jacket buttoned, slide your thumb between the button and your gut. If your thumb is snug, good. If it’s a little loose or tight, try a different size.
  5. Your pants should sit at your natural waistline (about an inch below your navel)

Now, you will need nice dress shoes and a matching tie.

It is okay to have a pattern or some type of design, however, never have the same pattern style or type on multiple pieces. It is meant to be a little accent to your outfit, not the whole outfit.

  • The jacket sleeve hem should fall at the wristbone with about one-fourth to one half inch of the shirt cuff showing below.

  • The bottom hem of the jacket should cover the butt and the vent shouldn’t pull open. If it does, that means it’s too tight.

  • The collar should lay flat on the back and sides of the neck without any gaps or bulges.

  • Pants should fit comfortably when standing and sitting and break across the top of the shoes so they cover the top one-third.

  • A bow tie should fit snugly around the collar.

Click here to read more about keeping your clothes cleaned properly!

Below are some more quality tips to spruce up your style on your wedding day!

Waist Coats

Waist coats are the perfect vintage accessory – whatever the era, season or venue! Layered under a jacket, in matching or contrasting material, they look dapper and add some extra warmth for an Autumn or Winter wedding. Or they smarten up a simple shirt, whilst looking more casual than a jacket – and infinitely cooler for a Spring or Summer wedding
..

Waistcoat
Waistcoat-3
Waistcoats-5
download (3)

Previous
Next

Braces (or suspenders)

Whether functional or purely decorative, braces/suspenders are the accessory of choice for the more relaxed, rustic, casual wedding Match them to the shirt or suit for a smart subtle look, or be daring and choose a contrasting colour to the suit but match them to the ties, shirt or shoes. Oh and if he decides to go with a patterned pair be sure to keep the shirt plain.

Previous
Next

Old World Fabrics

This is a statement look not for everyone, but tweeds, houndstooth and plaid are fun and stylish fabrics for a bold groom looking to channel his inner country gentleman! Even in a suit these textured textiles have the knack of looking more rustic and casual than formal; but at the same time, as the fabric of choice for the aristocracy (according to Downton Abbey) they suggest luxury and elegance
..

Previous
Next

Bow Ties

The bow tie is the epitome of vintage chic for any gent! Fashionable since the 18th century choose from floral, velvet, tweed or even sequinned for a smart look with a hint of fun
..

Previous
Next

GROOM TIP

A Groom Should Practice Wearing the Clothing He’ll Wear on His Wedding Day

What I mean by this is actually putting your clothing on and wearing it for a bit. Feel free to wear it around the house to get comfortable with it on or even during a day at work.

Just be careful not to damage the outfit in any way! 

If you buy a new pair of shoes for your wedding also ensure that you break these in prior. There is nothing worse than sore, uncomfortable feet!

 Communicate with the Bride-to-Be About Wedding Clothing Preparations

This pointer is extremely critical!

Your woman is an important part of the preparation of your wedding but be sure to add your input as well.

Offer direction and guidance to your groomsmen in terms of what clothing they should wear right up to the accessories.

Once you do, make sure you have this communicated to her. If you have done your research and have taken “the bull by the horns” she should be onboard with this.

Communication is key in life. Besides, taking part in a wedding that you feel have directly contributed to makes it that much better.

“THEY HELPED ME MATCH SHIRT AND TIE… I FEEL CONFIDENT.”
MUGISHAAttoreny
“THESE GUYS ARE THE BEST IN TOWN, REAL REAL IMPORTED CLOTHES” 
KITAKUYIOffice
I am slide content. Click edit button to change this text. Lorem ipsum dolor sit amet, consectetur adipiscing elit. Ut elit tellus, luctus nec ullamcorper mattis, pulvinar dapibus leo.
John DoeCEO
30 days before wedding Suits Avenue saved my neck, QUALITY and customer care
RobertCEO
The gals made look smart for my job interview..AND i won the position…Thx Suits Avenue
SimonEmployeed
Previous
Next

Find us, Follow us, and like us on FACEBOOK for latest fashion Trends…


Facebook

Click and SHARE…We would love to help your friends look smart…đŸ•ș💃 


If you have any questions
kindly fill out the form below

More Blogs

đŸ•”How to Tie your TiesđŸ•”

How To: Tie a necktie knot

Hi Everyone and thank you for stopping by Suits Avenue’s Blog page!

Have you ever had that one special event that you were so excited for…you start crossing the days off your calendar, checking the countdown you how downloaded on your phone every 15 minutes as if that’s going to take the days away…but then that day finally comes and BAM just like that all your excitement is gone…. you don’t know how to tie your tie.

Well worry no more! In today’s blog, we are going to walk you through simple step-by-step guides to tying your own tie.

The first tie we are going to discuss is the Prince Albert. We teach men who come to our store this specific knot because its quick and simple leaving your perfect day hassle free.

Prince Albert knot

Knot Size: 3/5       Symmetry: 2/5      Difficulty: 3/5

Step-by-step how to tie the Prince Albert knot:

  1. Start with wide end on right slim on left
  2. Move the wide end from the right to the left
  3. Move the wide end under the small end and to the right
  4. Move the wide end across the front and to the left
  5. Move the wide end under the small end and move the knot up while pulling the smaller side down and it will tighten.. you are now complete with the Prince Albert Tie.

windsor

Knot size: 3/5     Symmetry: 3/5     Difficulty: 3/5

  1. Start with wide end of the tie on the right and the skinny side on the left
  2. Move the wide end over the small and to the left
  3. Move the wide end under the small end and to the right
  4. Move the wide end up the center, towards the neck loop
  5. Move the wide end through the neck loop and to the left
  6. Move the wide end across the front and over to the right
  7. Move the wide end up into the neck loop from underneath (This will create a loop)
  8. Move the wide end down through the loop just created in the front
  9. Tighten the knot by pulling down on the wide side and pushing the knot up…. you have now completed the Half-Windsor

đŸ€”Click here to learn how to dress for an interviewđŸ€”

full-windsor

Knot Size:  4/5    Symmetry: 5/5   Difficulty: 2/5

Step-by-step how to tie the Windsor knot:

  1. Start with the wide end on the right and the skinny end on the left.
  2. Move the wide end over the small end and to the left
  3. Move the wide end up into the neck loop from underneath
  4. Move the wide end now down through that neck hole and to the left
  5. Move the wide end around the back of the small end and to the right
  6. Move the wide end to the center towards the neck loop
  7. Move the wide end through the neck loop and down to the right
  8. Move the wide end across the front to the left
  9. Move the wide end up and into the neck loop from underneath (This will create a loop)
  10. Move the wide end down through the loop just created in the front
  11. Tighten the knot by pulling down on the wide side and pushing the knot up… you have now completed the Windsor Knot

đŸ€”Â Now that you know how to tie a few knots- click here to learn how to match your tie with your suit!Â đŸ€”


oriental-knot

Knot Size:  1/5    Symmetry: 4/5   Difficulty: 1/5

Step-by-step how to tie the simple knot / oriental knot:

  • 1. Start with the backside of the tie facing away from you, the wide end is on the right and the small end is on the left. The tip of the small end should rest slightly above your belly-button (this will vary depending on your height and the length & thickness of your tie). Move only the active (wide) end.
  • 2. Wide end under the small end to the left.
  • 3. Across the small end to the right.
  • 4. Up into the neck loop from underneath.
  • 5. Down through the loop you’ve just made in the front.
  • 6. Pull down on the wide end to tighten. Slide the knot up to adjust.


four in hand knot for tie

Knot Size:  2/5    Symmetry: 3/5   Difficulty: 1/5

Step-by-step how to tie a four-in-hand knot:

  • 1. Start with the wide end of the tie on the right and the small end on the left. Begin with the small end slightly above your belly-button (will vary depending on your height and the length & thickness of your tie). Only move the active (wide) end.
  • 2. Wide end over the small end to the left
  • 3. Under the small end and to the right
  • 4. Across the front and to the left
  • 5. Up into the neck loop from underneath
  • 6. Down through the loop you’ve just made in the front
  • 7. Tighten the knot by pulling down on the wide end. Slide the knot up & adjust.


For other GREAT how-to tips on tie tying visit

ties.com

Stop on in the store today and we can help you tie your tie!!!

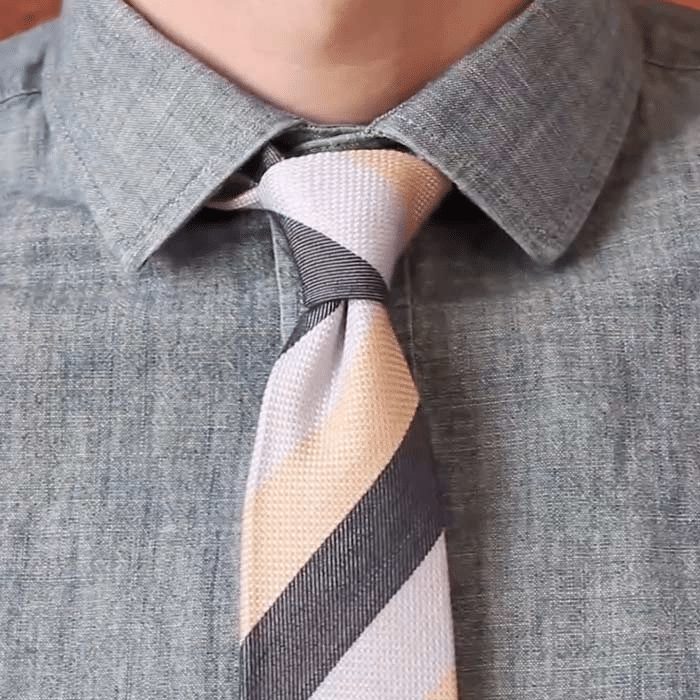
The tie is pretty much the one variable that pulls the entire suit together and garners respect from friends, foes, and strangers. I could walk you through dozens of different knot styles from the simple to the elegant – but it all comes down to the Simple Knot, which is where we will start.

Tie

There are many names that it can be known by (oriental, kent, petit noeud) but this style contains the fewest steps and is the easiest, most basic tie knot, that everyone should understand. This knot works well with thick neckties or for tall guys who need a little extra length. It is surprisingly not that popular in the U.S. put it provides great symmetry for any look. 

*Tip* This is the knot to use with a skinny tie. Just keep in mind, if you wear a skinny tie, make sure to wear a skinny suit. You shouldn’t have a lapel width thicker than two inches at the absolute most. *Tip*

How-To tie a simple Knot

Step One: Drape the tie inside out over your neck, with the wide end longer and on your left. 

Step Two: Wide end goes to the right under the small end. 

Step Three: Bring it back to the left over the small end. 

Step Four: Bring the wide end up through the neck loop. 

Step Five: Carry the wide end back down through the knot you just made in the front. 

Step Six: Tighten and slide the knot up to adjust

Ties

Why should you learn to tie a knot? 

Simply put: learning how to tie your tie in a nice, crisp knot will earn you more respect in the workplace. 

Here’s how:

I mentioned that the tie is the one variable to pull everything in the outfit together. The tie has stood the test of time because they’re aren’t some run of the mill passing trends. According to Ties.com  “A neck tie has always been, and always will be, the square root to really getting respect when it comes to your menswear game. There’s a reason why men in power have worn ties throughout history.”

Men in suits

Respect and Confidence

Once you master these knots you will have the respect and the confidence to succeed in any workplace. A well placed tie will cut through your outfit with pride and if you wear a tie with absolute confidence, it will translate through and upon first moment’s glance, respect will be established.

Empower Your Career

Getting up and putting on a tie every day will instill confidence, respect, and also help embolden you in your daily activities. This is how Ties.com  puts it: “someone wearing a tie generally has a level of professionalism that must be sustained to remain the successful individual they are. In this case, the tie may or may not be in direct connection with their work day. When people see a man wearing a tie, the tendency is to assume they are looking at a professional – whether young or mature.”

Neckties

In today’s changing workplace environment the importance of knowing how to tie can often be ignored. But a tiny sliver of fabric that measures just shy of 60 inches can really go a long way toward establishing respect in the workplace. Once you master the simple knot reach out and keep reading the blog here at Suits Avenue where we have all the tips and tricks you need to master these knots!

Click here to read more about keeping your clothes cleaned properly!

“THEY HELPED ME MATCH SHIRT AND TIE… I FEEL CONFIDENT.”
MUGISHAAttoreny
“THESE GUYS ARE THE BEST IN TOWN, REAL REAL IMPORTED CLOTHES” 
KITAKUYIOffice
I am slide content. Click edit button to change this text. Lorem ipsum dolor sit amet, consectetur adipiscing elit. Ut elit tellus, luctus nec ullamcorper mattis, pulvinar dapibus leo.
John DoeCEO
30 days before wedding Suits Avenue saved my neck, QUALITY and customer care
RobertCEO
The gals made look smart for my job interview..AND i won the position…Thx Suits Avenue
SimonEmployeed
If you have any questions or need help fill out the form below or stop in today and

Find us, Follow us, and like us on FACEBOOK for latest fashion Trends…


Facebook

Click and SHARE…We would love to help your friends look smart…đŸ•ș💃 

If you have any questions or need help speak with
or fill out the form below.

đŸ€”How to Dress for a WeddingđŸ€”

How To: Dress to Attend a Wedding

Hi everyone! Thank you for reading Suits Avenue’s blog!

Today we are going to show you the proper attire to wear to a wedding!

First, you will need to start with a nice dress shirt

WhatsApp Image 2018-03-23 at 3.36.07 AM (2)
Made Imported from Italy and Turkey 150kand Imported from Italy and Turkey 200k for set
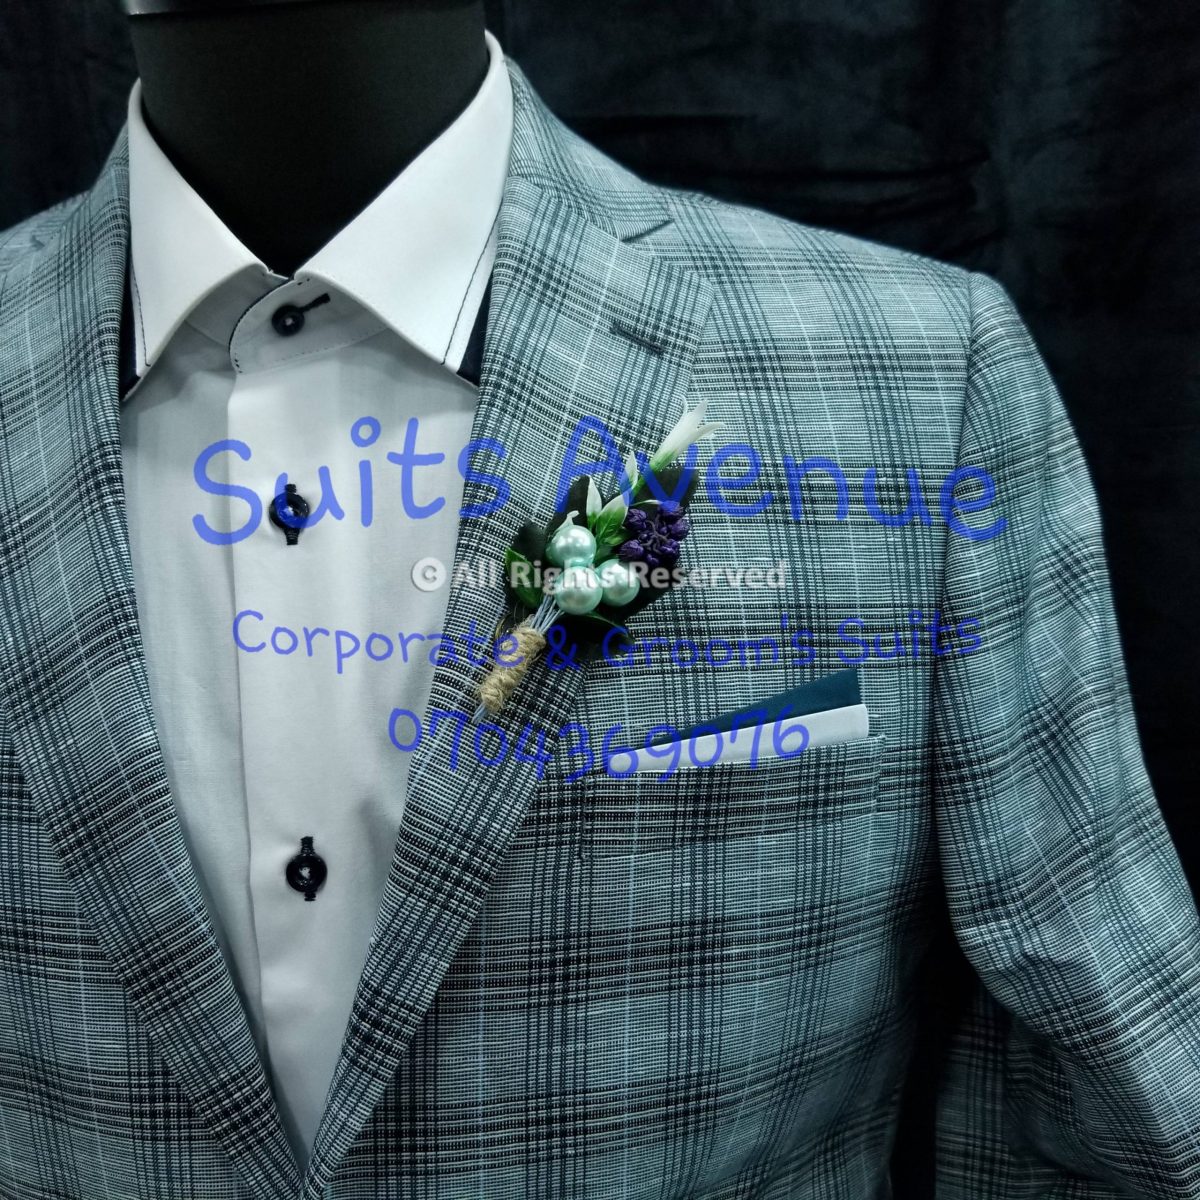
For a formal occasion like a wedding, it is best to stick with solid color undershirts, the most common shirts are white or black, depending on the color of your suit.

Next, you will need to find a tight-fitting vest.

WhatsApp Image 2018-03-23 at 3.37.48 AM (18)

It is best to get a tight-fitting vest so your jacket will easily form with your body so it doesn’t look baggy or too big.

Now, you need nice, ironed dress paints and a matching blazer.

WhatsApp Image 2018-03-23 at 3.37.06 AM (13)

When purchasing your jacket there are a few key things to look for

  1. Make sure your shoulder fit perfectly. You don’t want them to be too snug so you cant move your arms, but it also can’t be too big and look like you are wearing shoulder pads.
  2. With the jacket buttoned, the lapels should lie flat on your chest. If they bow or leave a gap around your shirt collar try a different size.
  3. Your sleeves should hug your arms and show a half-inch of cuff
  4. With the jacket buttoned, slide your thumb between the button and your gut. If your thumb is snug, good. If it’s a little loose or tight, try a different size.
  5. Your pants should sit at your natural waistline (about an inch below your navel)

Now, you will need nice dress shoes and a matching tie.

It is okay to have a pattern or some type of design, however, never have the same pattern style or type on multiple pieces. It is meant to be a little accent to your outfit, not the whole outfit.


Click here for Special FREE offer with purchase…

  • The jacket sleeve hem should fall at the wristbone with about one-fourth to one half inch of the shirt cuff showing below.

  • The bottom hem of the jacket should cover the butt and the vent shouldn’t pull open. If it does, that means it’s too tight.

  • The collar should lay flat on the back and sides of the neck without any gaps or bulges.

  • Pants should fit comfortably when standing and sitting and break across the top of the shoes so they cover the top one-third.

  • A bow tie should fit snugly around the collar.

Below are some more quality tips to spruce up your style on your wedding day!

Waist Coats

Waist coats are the perfect vintage accessory – whatever the era, season or venue! Layered under a jacket, in matching or contrasting material, they look dapper and add some extra warmth for an Autumn or Winter wedding. Or they smarten up a simple shirt, whilst looking more casual than a jacket – and infinitely cooler for a Spring or Summer wedding
..

Waistcoat
Waistcoat-3
Waistcoats-5
download (3)

Braces (or suspenders)

Whether functional or purely decorative, braces/suspenders are the accessory of choice for the more relaxed, rustic, casual wedding Match them to the shirt or suit for a smart subtle look, or be daring and choose a contrasting colour to the suit but match them to the ties, shirt or shoes. Oh and if he decides to go with a patterned pair be sure to keep the shirt plain.

Old World Fabrics

This is a statement look not for everyone, but tweeds, houndstooth and plaid are fun and stylish fabrics for a bold groom looking to channel his inner country gentleman! Even in a suit these textured textiles have the knack of looking more rustic and casual than formal; but at the same time, as the fabric of choice for the aristocracy (according to Downton Abbey) they suggest luxury and elegance
..

Bow Ties

The bow tie is the epitome of vintage chic for any gent! Fashionable since the 18th century choose from floral, velvet, tweed or even sequinned for a smart look with a hint of fun
..

A Groom Should Practice Wearing the Clothing He’ll Wear on His Wedding Day

What I mean by this is actually putting your clothing on and wearing it for a bit. Feel free to wear it around the house to get comfortable with it on or even during a day at work.

Just be careful not to damage the outfit in any way! 

If you buy a new pair of shoes for your wedding also ensure that you break these in prior. There is nothing worse than sore, uncomfortable feet!

 Communicate with the Bride-to-Be About Wedding Clothing Preparations

This pointer is extremely critical!

Your woman is an important part of the preparation of your wedding but be sure to add your input as well.

Offer direction and guidance to your groomsmen in terms of what clothing they should wear right up to the accessories.

Once you do, make sure you have this communicated to her. If you have done your research and have taken “the bull by the horns” she should be onboard with this.

Communication is key in life. Besides, taking part in a wedding that you feel have directly contributed to makes it that much better.

“THEY HELPED ME MATCH SHIRT AND TIE… I FEEL CONFIDENT.”
MUGISHAAttoreny
“THESE GUYS ARE THE BEST IN TOWN, REAL REAL IMPORTED CLOTHES” 
KITAKUYIOffice
I am slide content. Click edit button to change this text. Lorem ipsum dolor sit amet, consectetur adipiscing elit. Ut elit tellus, luctus nec ullamcorper mattis, pulvinar dapibus leo.
John DoeCEO
30 days before wedding Suits Avenue saved my neck, QUALITY and customer care
RobertCEO
The gals made look smart for my job interview..AND i won the position…Thx Suits Avenue
SimonEmployeed

Find us, Follow us, and like us on FACEBOOK for latest fashion Trends…


Facebook

Click and SHARE…We would love to help your friends look smart…đŸ•ș💃 

If you have any questions or need help speak with
or fill out the form below.

Our Blogs on Fashion…

👀How to see QUALITY in your suit👀

How To: See the Quality in your Suit.

Hi! Thank you for reading
blog!

Today we are going to talk about HOW you can see the quality of your suits!!

Suits are a big investment, and with the right material and a little extra money, they can last as long as 20 years!!!

As we tackle the different signs of a good quality suit, don’t forget the upkeep is just as important!

Click here to learn how to take care of your suit, and when to clean it.

The first sign to look for regardless of where you buy your suit from is the fabric quality is vital.  The only words you want to see are “100% Wool” or better.

Look at the lining- A fused lining that’s held together with glue is about as bad as going for a $99 polyester suit. The cheapest quality suits will have a fused lining. The highest quality suits will have a full canvas or at least a half canvas.

Check out the stitching- The ability for mass-manufacturers to replicate what used to be hallmarks of a custom suit has never been greater. With that said, you still want to examine the quality of the craftsmanship and look to see how the suit comes together.

You do not want a suit with jagged, loose, crooked stitching.


Click here for Special FREE offer with purchase…

PAY ATTENTION TO THE DETAILS. From the way the pockets come together, to the drape, the buttonholes, and the boutonniere loop. Each of these small details often have the biggest impact when it comes to how you look. Machine-sewn pockets aren’t as sturdy and will wear quickly when utilized. Stiff lapels without a slight roll are a hallmark of a cheap suit. Plastic buttons can break, and even horn buttons that use plastic anchors can fall off in the middle of your board meeting.

PAY ATTENTION TO HOW IT WAS COLORED. the last thing you want is to leave the store with a great navy suit and have it look four shades of blue by next summer. Look at the design. How is it dyed? Is it even and are the colors vivid? Will they fade? Is the pattern perfectly done across the suit, or do they misalign where the fabric was cut? Bottom line: look closely and pay attention.

THE FIT

It’s all about the perfectfit. The fit of your suit is arguably the most important aspect of a good quality men’s suit. It’s also the aspect with the most impact on how your suit looks and feels on you. Ask yourself, if the suit doesn’t fit you perfectly, why buy it?

After all, it’s not a cheap purchase. Off-the-rack suits use a “standard sizing,” which is a sort of one-size-fits-all approach to suiting that uses only chest size and jacket length to determine your “ideal” fit.

What about other factors like:

  • Sleeve length
  • Sleeve and trouser circumferences
  • Crotch length

In addition to the above, what about your posture, and the shape of your shoulders? The list goes on. Your body is a unique shape and size so even if you think off-the-rack sizing is ok for you, there will always be one area of fit that’s not quite right.

Getting the perfect suit fit is a game of inches
 well 1/4 inches actually! A good quality men’s suit is one that’s made to your exact body measurements. Period.

Click here to read more about different fittings of suits.

The Construction of your suit should be “Half Canvassed” or “Fully Canvassed” and not “Fused.” One of the key differences between premium and low quality suit jackets is their construction. The chest of any jacket should be constructed of three (3) layers of material:

  • The fabric on the outside of the coat
  • The lining that makes up its inside
  • A layer of canvassing in between that gives the coat its shape

HOW TO TELL A CANVASSED VS. FUSED JACKET – THE “PINCH TEST”

It’s easy to check whether the suit jacket you’re looking at is fused or canvassed. Simply pinch the chest fabric and lining between the fingers of each hand and pull them apart slightly. If it’s canvassed, you should be able to feel three distinct layers: the outside fabric, the canvas, and the lining. If it’s fused, you’ll only feel two layers. To distinguish between Full and Half Canvassing, perform the same pinch test down by the buttons.

ALSO LOOK FOR

  • Proper handcraft stitching around the lapels (not machine stitching – you’ll know this by the accuracy of the stitches. If it’s too perfect, it’s machine stitched)
  • Working cuffs on the jacket sleeve – a sure sign of quality and a custom made suit
  • Reinforced jacket buttons, and buttons on “stems” for easy buttoning
  • Real woollen felt under the collar
  • Spare buttons (in all sizes)

“THEY HELPED ME MATCH SHIRT AND TIE… I FEEL CONFIDENT.”
MUGISHAAttoreny
“THESE GUYS ARE THE BEST IN TOWN, REAL REAL IMPORTED CLOTHES”
KITAKUYIOffice
I am slide content. Click edit button to change this text. Lorem ipsum dolor sit amet, consectetur adipiscing elit. Ut elit tellus, luctus nec ullamcorper mattis, pulvinar dapibus leo.
John DoeCEO
30 days before wedding Suits Avenue saved my neck, QUALITY and customer care
RobertCEO
The gals made look smart for my job interview..AND i won the position…Thx Suits Avenue
SimonEmployeed

Find us, Follow us, and like us on FACEBOOK for latest fashion Trends…


Facebook

Click and SHARE…We would love to help your friends look smart…đŸ•ș💃

If you have any questions or need help speak with
or fill out the form below.

Our Blogs on Fashion…

WhatsApp Chat